Monthly Archives: February 2009

Kitchen Towel Swap

It’s been a long time since I put together a towel swap or even participated in one.

I’m feeling pretty frisky and ambitious. I like getting people involved in things like this.

We know how the economy is right now and we are limiting ourselves from purchases. Wouldn’t it be nice to have something new.

Participation to this towel swap would be low cost. Each participant would send me a machine embroidered towel with a self addressed stamped envelope. For this first swap I would like to limit to the United States only. If this swap is successful I will do another one that will be all over, but rules would be different, you would have a swap partner.

Spring and summer is approaching and the theme would be designs falling in those categories. Butterflies, flowers, birds, anything that reminds you of spring and summer.

It is also open season to baseball, so consider me lead off man. The first received towel would get my embroidered set, not one, but a set. I have provided photos of the sets that the lucky first person could choose from. Yes I am giving the first person an option of which set to choose from. Just to let you know, additional postage will be needed, but I will pay the cost. You never know, I might even add a little extra item in this swap. So you have to get yours in as soon as possible. When I receive the first towel, I will contact you, sew you need to make sure that you provide me with your email address. It would be nice that everybody provide their address so the recipients can jot each other a little note that they received their item and thus get to know each other.

The first swapper will then swap their towel with the next towel I receive and sew on and sew on and sew on. I won’t close the swap until it slows down, so you never know it could go for a whole month. The last towel received and closes the swap, will be my towel. I will take photos of all the towels and post them on my flickr account so everybody can see all the participants handy work. I will even post some of them here on my blog.

So lets get the ball rolling. Post below a note and send me an email at my alternate address, insane14now@sbcglobal.net for my mailing address. Here are the towel sets, the ants you get both ants and you have a choice of either blue or orange the other flower towels, you will get a set of two. If I receive two towels on the same day, both will get a set to choose from. If you both pick the same set, my daughter will pick your name from a hat. Lets have some FUN and refer your friends to join in. The more the merrier. 


Stabilizers – Which one to use for your machine embroidery

Whether you are a beginner to machine embroidery or you’ve been embroidering for some time, there are still times when you don’t know which is the best stabilizer  to use. There are many kinds of stabilizers out there made by so many different manufactures. You can get them at your local fabric, sewing, retail stores or off the internet. Which do we buy, sheets or rolls or by the yard. I don’t push people to buy certain brands because everyone has their preferences. I have preferences and all my embroidery friends have theirs. I can say we are all different in our choices.

One of my first projects I did, I was embroidering on a t-shirt. It was a Fruit of the Loom product purchased at the local flea market. I thought I would make some real cute animal designs on the upper left side. I washed my garment to allow for shrinkage. I took out my iron-on tear-away and put it on my garment, allowing the stabilizer to hold the stretchy fabric from shifting. Next I placed a light weight cut-away using a spray adhesive. Did my design. It turned out really nice, the little koala bear. When it was time to wash my little koala bear t-shirt I was wanting to wear it again and again. Much to my disappointment, I really never wore it again. I don’t know what happened, but either the t-shirt didn’t do all its shrinking or I did not use a heavy enough cut away stabilizer. We all learn our lessons and we always hope that it’s not on an item we are making for someone that they requested for a possible sale.

No matter what type of project I am working on, I always use the iron-on tear-away even if the fabric is not a knit or stretchy fabric. I just like the fact that the iron-on keeps the item more stable, especially when you are hooping. I don’t necessarily hoop the stabilizer like it is suggested. On my stretchy items a cut-away is used. Depending on the weight of the garment determines whether a light or heavy weight stabilizer is needed. When I’ve done denim shirts, I’ve only used iron-on tear-away. A transparent fabric or even polo shirt you use a light weight.  Jackets, coats a heavier stabilizer. It is recommended that if your design has a high stitch count, you should also use a stabilizer (maybe that is why my aprons I had problems with).  I seldomly use a spray adhesive because I don’t like the idea of gunking up machine. What I do is place a large piece (bigger than the design) of stabilizer over the iron-on, then scotch tape to hold it in place. 

When doing terry towels or a garment that has a form of pile or thick nap, a water soluble is placed on top. The water soluble keeps the thread from sinking into the nap or pile. Depending on the project or design determines if a stabilizer is needed underneath. For a towel, water soluble is fine, but if it is a fleece shirt, I would put lightweight stabilizer underneath so that the design keeps its shape. If I were to embroider a terry robe, I would use a cut-away. Some water soluble stabilizers you need to keep air tight so that they don’t harden. I use two different types of water soluble products, one is a mesh type that is soft and the other is a plastic type. I keep my plastic type wrapped in a heavy plastic bag. I’ve seen some of the plastic type water soluble products at local fabric and retail stores and where they don’t wrap it, it becomes hard and for the amount of money you pay for it you want it flexible. The mesh type is nice, but you want to make sure that you keep water away from it cause it totally dissolves if you accidently spill on it!

Have you ever stitched a design on a dark garment and on some of the lighter or pale threads, you can see the color of the garment bleeding through. This is where you might consider putting the tear-away on top of the garment. This gives your item a more clean look. You have to make sure that when you remove the stabilizer you get all the tear-away. Sweatshirts that I’ve done, where I put the iron-on on front, because of the thread count, I used a cut-away stabilizer underneath.  

When I first started out embroidering, there weren’t as many stabilizers out as there is today. I don’t recall mesh nor heat-away stabilizers. I know that when the first iron mesh stabilizer came out, I bought some on sale for 10 bucks a roll. I knew that one application I would use the mesh for was for baby clothing that I would iron the mesh over the stitches so that the babies skin would not be irritated from the thread. Of course babies aren’t the only one sensitive to the sratchy threads, people are too. My boss knew about my embroidery and asked if there was a product that could be put over some stitching from shirts he had gotten. He was very pleased with the outcome. The other application I used the mesh for was for huck towels that I did toile work on. I didn’t know what other stabilizer to use. Didn’t like the idea of using a tear-away because I was afraid I would rip the design or towel. As long as I only used a size of mesh the size of the design I had no problem.

I’m still hesitant to the heat-away, because I am afraid it would gunk up my iron. But the concept is great. Just passing the iron across the stabilizer and it melts away. I’ll have to take the plunge and try it. It’ll be great for toile and red work. I know you can even use it as a water soluble too.

Then you have the adhesive stabilizers for those hard to hoop items. I liked the product and used them when I did baby socks. It was a pain, but it worked. But then again the dreadful thought, stickiness gunking up my machine. I don’t know, I just have issues about glues. How many other stabilizers are out there, I don’t know, but I really like learning about them and knowing more on each type and what different applications you can use them for. The more information you have, the better off you are.

I want to indicate that my sewing club had a representative from Floriana give a show of all their products one year. Was I impressed. No. The representative didn’t do a good job in selling the products. Where I ama potential purchaser, I am interested in all aspects of this hobby. I want to be able to ask a question and get an answer that I fully understand. When you don’t understand a reply and keep questioning and they snip back at you, that doesn’t help sell your product. When a crafter, like myself, has all these ideas or possibilities of how to use their product and you are completely ignored because you are too interested and want information and they continue to ignore you, you don’t need their product. The other killer of the show, when a representative brings in examples of stitch-outs using their products, you should update your samples instead of bringing in items that are outdated or on crummy garments. You are selling a product, you want quality merchandise. So did I leave with any products. No.

The best thing that I’ve seen is how organized you can be with your stabilizer. How many of us have sheets or rolls of stabilizer scattered throughout our rooms. Not knowing which stabilizer is for what or where did we place it last. Sewforless announced last year Stabilize It!  You purchase a box of pre-cut stabilizer, there are 16 items to choose from. Each box has an opening like a box of tissue in which you can see how many sheets you have. You grab a sheet of stabilizer easily from the box. The box has the information of which type of stabilizer it is and they are color coded. There are quick tips right on the box with instructions and uses for each stabilizer. Best thing is that they are stackable to keep your room organized. Oh and BTW, their on sale.

So no matter what type of stabilizer you use, you will learn to know what stabilizer to use on your projects.

See more information on stabilizers at Threads.

Update Metro Embroidery Threads

King Cones $1.89

King Cones $1.89

I didn’t order my extra king cones of embroidery thread, but I figured I’d stop over to Metro Embroidery Threads to see if their king cones where still available at 2.25.

King cones, 5000 meters or 5500 yards of 100% polyester thread is even lower than my last post. The cost of each spool is now 1.89 each.

What a sale. Time to look over the colors once again and put in an order. I really do love their thread.

I love google searches!

Machine Embroidery on paper

I’ve sewn on several different types of paper, but I’ve never embroidered on kiwi paper. I sorta don’t like the patterns of the kiwi paper and well the other thing is, everybody is embroidering on kiwi paper. Kiwi paper I feel is basically used for acrylic items, thus limitations.

Remember, I like to be different in my creativity. I believe in a previous post I indicated that I purchased my paper items from a art store in town. Unfortunately they don’t carry some of the neat stuff they used to. I have found a site on the internet that has some fabulous items, but at the time they were on vacation or redoing their website. 

I am really particular on my purchases. I would rather be able to see in person the product. The reason for this is when looking at the product, you can feel the texture of the paper. Feeling the texture allows you to visualize if it can be used for embroidery.

I always ask myself questions. Is the paper too flimsy, will it tear easily. If stabilizer or fabric is used underneath the paper will it add depth? Depending on the density of the design, what will it do to the paper.

I’ve not obtained any rice paper that I’ve liked, however I did see some that was beautiful, but when I went back to get it is was gone! It was white with oriental designs in it. I’ve purchased some paper that is thick because it is a form of pulp process and it has very small dried leaves on it. My plan is to use this paper to embroider plant life on it. Thought process forming, I wonder if Anita Goodesigns Fritillaria Wall Scenes would look good on this paper. I would definitely have to make sure I use a stabilizer on the back. Then I have to consider the piecing of it together. Never did a wall scene.dscf1090_21

This item was a gift to my sister who lives on Lake Michigan. The embroidered design with the chairs was done on paper and if I recall (I don’t remember) blue fabric behind it. The design was shrunk to fit the area and the density in areas was heavy. The first attempt the paper was tearing and I really didn’t want to use a white stabilizer behind it. So to add dimension or effect, I put the blue behind it. The color also brings out the texture in the paper. It is not wrinkled paper, its strands of woven fiber running through it. 

The white seashell underneath it. That is done on wood paper. I cannot for the life of me remember the name of the stuff. It is not balsa wood. Gonna tell you, I did use a stabilizer behind it because of the density and it did tear around the bottom. Well guess that’s why we have glue sticks to hide imperfections.

The last seashell. When you have toile work, that is the best to work on paper. I love this white paper and I CAN’T GET IT ANYMORE. I am going to take a piece to the art store and see if I can get more of it. This paper is great because it has texture and dimension. (OMG my power cord was off and I almost lost all of this) Yes the swirls in the paper that you see, they are actually pressed in the paper. The swirls remind me of waves. I didn’t go the extra mile on this piece, I was to take sand and sprinkle it across the shell and paper. Now we don’t want to get too creative do we.

The two small boxes were just to small to do anything and that is why I took a darker piece of the wood paper I purchased and glued two small neat seashells to the piece. Nope I take that back. I put the wood paper inside the glass and glued the seashells to the glass on the outside!

See how much you can do with machine embroidery. You can take a piece of embroidery and make it a piece of art. And you are having fun doing it!

Machine embroidery is not just for fabric

As tired as I may be, I thought that in the coming weeks I would talk about some how-dos on machine embroidering not only for the beginners out there, but for the advance embroider as well.

I’ll talk about different projects that I’ve done. If a reader is interested in something particular and has questions or needs assistance, I’ll be more than happy to see if I can assist or even another reader can give a few pointers.

We all try to embroider on different types of fabric. We take that chance to see how well we succeed. I haven’t embroidered on every type of fabric, but I’m getting there. There are some fabrics that I just don’t wish to take the chance or well I just have no desire to even try.

dscf0674

I like to experiment. I like to take a chance to see how creative I can be. In this photo I embroidered on painting canvas. Looking at the picture you could assume that it was a possible etching. But as you get close to it, you see the actual stitches and you want to touch it. Sure enough the item is dimensional. When I first presented this to the sewing club that I went to all the women were amazed at my handy work. The questions that came out. Did you hoop the canvas? What stabilizer was used? The canvas was hooped and it wasn’t easy because of the thickness of the canvas. There was no stabilizer used. The fiber of the canvas is already thick and the density of the design wasn’t complex that I wasn’t worried that it would pierce and rip the canvas. The reason stabilizers are used is to keep shape. With painting canvas you end up stretching it on a frame. As long as the design kept its shape while stitching out, I didn’t have to worry about anything. While the design stitched there would be an occasional pucker, but again, its going to be stretched. I did a series of 3 designs of these vintage ladies that I purchased from BFC. I sold the set and will continue to do more in the future on canvas. My next set will be Geisha ladies. Depending on the density of the design, I might put a stabilizer behind it just for added protection, but then again, do you want to see a cut away stabilizer on the back side?  I have since purchased fast frames and it’ll be easier to work with.

Acai berry – Oprah does not endorse product

The Truth About Oprah and Açaí – Consumers should be aware that Oprah Winfrey is not associated with nor does she endorse any açaí berry product or online solicitation of such products. Attorneys for Harpo are pursuing any companies that claim such an affiliation.

The above is from Oprah’s site, now read the BBB site below.

Arlington, VA – January 5, 2009 – Better Business Bureau is warning consumers to be wary of online ads relying on celebrity endorsements to sell acai-berry related weight loss products. BBB has received thousands of complaints from consumers nationwide who thought they were signing up for a free-trial offer of acai berry weight loss products that were supposedly endorsed by Oprah, Rachel Ray and other celebrities; in the end, the free trial cost them, month after month, http://us.bbb.org/WWWRoot/SitePage.aspx?site=113&id=1869d6a9-82aa-49a1-8419-40a8251fa916&art=8493.

After someone responded to my original post about the scam they indicated that the Acai berry works. I don’t recall how much weight people loose, but I haven’t lost loads of weight in the month that I have been using it. 

Last week I received a shipment from Florida for a month supply of acai berry. I was not going to open the package. I opened the package to see if there was anything in it and sure enough there was a packing list and charge for the 89+ going to my credit card. The invoice indicated that at any time I could easily call the 800 number and cancel my order. So I ripped the 800 number off the invoice, taped up the package and scribbled out my address and put on the package, RETURN – DID NOT ORDER!

The next day I called the 800 number and as I figured, the call was answered by someone not in the states, it went overseas. I indicated that I wanted to cancel my order of acai berry. They asked for my invoice number, in which I replied that I did not have it I only had the 800 number. He then asked for my home number or last name, can’t recall. Anyways, I indicated to him that I wanted to cancel all future shipments of the product. He indicated to me that I signed a waiver indicating that I had to accept and could NOT cancel at any time. EXCUSE ME! I told him that the invoice clearly stated I could and now he was telling me NO. I basically said to him, well the package is coming back and I have already cared for the matter, they could continue to send me the product, however they will not be receiving any future payments from my credit card. I hung up the phone.

Comment that Oprah or Rachel Ray endorse the product, prove it!

UPDATE 7:30 PM – Between the time that I cancelled my credit card and had a new one established, MYACAISUPERF charged me another 95 dollars, plus a foreign exchange fee.

I was just at the bank this afternoon to get my online stuff cared for!!! Another call to the bank!!!! Glad I got my declaration of unauthorized use today!!! I have been reassured that the two charges where transferred from the old account prior to the disonnect.


What to do if you buy curtains that are too short

We always have lessons to learn and one lesson that I seem to never learn is to measure length of windows when buying curtains, but then again, when I buy curtains, I usually am buying them on a whim.

Two weeks ago before going on vacation I was being rushed to get some major and minor things done. If I would have know that I would have had an extra day, I would not have rushed. 

JC Pennys had a terrific sale going on. We were in need of new towels and I figured buy several sets. I fiddled around and found the towels that would look good in our pale purple room, then grabbed a small area rug. I was looking at the curtains they had to offer but nothing short nor plain.

Decided to check out the drapery department to see what they had to offer. Even with retail stores, they usually don’t have short curtains for windows that are in the tub/shower area. And if they do, they are patterned or colors that won’t fit my decor. Ended looking at kitchen curtains, which guess what, where on sale! Found some real nice small checked shears in plain white. Got the longest length, 36 inches, thinking they would be just right.

Got home washed everything and then went to put the curtains up. You did it again sweetie, too short. Now you have to consider, the window is a customized size window, so it is very hard to get the right size. The plastic curtains we used to get were always way too long, thus the ones I just tossed out, I made. My SO liked them cause they were shear with colorful stripes that brightened the room as well as let light in.


dscf2474

So this morning after I shoveled our nasty, crappy snow, I took the curtains down and took out all the stitching on the top. My decision was to add lightweight white fabric at the top. Wasn’t sure how much was needed, decided 10 inches would be sufficient. Put a 1/4 inch seam on both sides of new fabric, sewed both items together. Ironed seam upwards, folded the white fabric to met the seam of the curtain. Didn’t have to worry about white fabric fraying because I made sure that the tightly woven selvage was at that end. Top stitched all fabrics together and then stitched another line. Ironed again. Then stitched 1 inch from the top and did another line of stitching about two inches for the rod. Took the one panel and hug it up. Perfect and that panel looked really nice. I then did the second panel and then hung it up. You would think that they were made that way and I could easily go to the fabric store and see if I can find some lace that matches what is on the bottom of the original curtains and put it were the two fabrics meet. This took me no more than two hours to complete and now my bathroom looks very nice and complete.

After I finished the curtains, I cleaned and scrubbed the bathroom to show off my handy work. Even my daughter said I did a nice job. Next project who knows, but after I did some more cleaning, I picked up my yarn to finish another scarf. I don’t think winter is done with us yet.

Mini-Mini Free Standing Lace Purses???

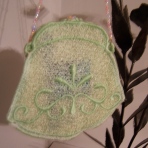
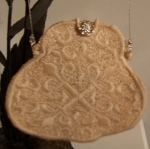
Okay here are the mini mini free standing lace purses that I made the other day with the thread that I purchased and really liked.

This is short cause I have to get to bed. Have to go back to work, since I’ve been off for 8 working days (can’t even remember when that was).

The eggshell purse is done in a different thread, but I thought I would show you that one too!

dscf2427dscf2432dscf2442_2

Project Creative Machine Embroidery – Eye Mask

Yesterday I was making eye masks that were purchased at EmbLibrary. The two items in yellow are the items I made. They are done in the hoop but I have issues with all in the hoop designs. They seem to be too small, so part of my changes, I made the mask pattern larger and took the design and decreased it. The other thing I had problems with, where do you put the ribbon!!! With the pattern Creative Machine Embroidery gives you, they tell you exactly where to put the ribbon, this is the mask in white. When I get home I will compare both patterns to see if one is bigger than the other. 

Unfortunately I was not a e-newsletter member with CME in January, I did not receive the design, however I can purchase the design for 10 bucks. I’ve been a subscription member for some time and never thought of signing up for the newsletter. Well now I have done so, so I can get extra added bonuses. 

I added a plus to my eye masks. In the pattern from EmbLibrary the back is open. I made a smaller closed eye mask with WaterSorb crystals in it. WaterSorb is used for cool ties for the troops. When you put the item in cold water the crystals absorb and swell up. I can then put one of the smaller eye mask in the stitched embroidered cover. It takes away stressed, puffy eyes and headaches. Then when not in use, put in a zip lock bag and put in frig to keep it cold for next use. And if the eye mask cover gets dirty, I can easily hand wash and hang to dry.

I know in the month of April each CME reader will receive a free embroidery design to promote Husqvarna Viking’s “go green” program. If you are a reader, visit husqvarnaviking.com/us for more information of this free offer.

Monogram Wizard Plus Drawing March 09

Another drawing taking place in the month of March is Needleheads Monogram Wizard Plus.

Monogram Wizard Plus include new monogramming style, fonts and motifs. There is also style selection, layers, improved letter movement and stitch selection. You will have the abillity to print the design you created in full size, then the ability to save as PES, SEW, JEF and JEF+ files in addition to DST files.

There will be one winner to win this software which sells for 350 dollars.

Don’t fret if you already have Monogram Wizard, you can opt to win 6 Alpha Packs instead, so you can still enter.

Enter once at needleheads.com only in the month of March.

If you are interested but need more information – go to http://www.needleheads.com/index.html

There is a trial download from Needleheads go to their home page listed above, click on Monogram Wizard Plus, then click on the download trial (I’m having difficulty posting the url).

This gives you plenty of time to do a test drive before entering to win.