A friend of mine contacted me Monday morning regarding my clutch purses. She was looking for a birthday gift that she needed by Saturday. She saw one of the clutches she liked, wanted to know price and if I still had fabric. Of course, silly question right ladies. So the only worry was getting it by Saturday.
After running around like a chicken with its tail feathers gone doing errands I finally get home to start the project. Here I will tell you how to make a cosmetic bag, complete with pictures. You will notice that I was so into getting this custom order done, I actually sewed up the things not realizing I didn’t take a snap shot.
Pick your fabrics. Usually these cosmetic bags are 10 x 10, but I go 10 x something. Iron the heavy weight fuse able interfacing to the main fabric. You will be using a zipper larger than 10 inches. Now to the machine.


Place the lining and fabric back to back, placing the zipper on top of the main fabric with the zipper pull down. Since you will be using a zipper larger than 10 inches, you do not center it, just let the extra hang on both the top. Eventually you will be cutting the extra off. Then using your zipper foot, sew together. I used quilting clamps to hold the items in place to get a even straight stitch, not shown. After you have sewn the zipper on, then fold the fabric over to top stitch. I used YKK zipper and was able to use my regular presser foot to do the top stitch. There all done, now to do the other side.


Fold the other side with the lining on the outside, main fabric on the inside. Make sure all edges match up, even the raw edges to the best you can. You then change back to your zipper foot and sew. Oops guess what, I forgot a picture on how to top stitch the other side. You need to open the zipper all the way in order to fold the fabric and top stitch. Its a tight fit but can be done. Again I switched back to my presser foot and my top stitch was 3.5. Now you have your zipper done. (I will update![]() with a picture next time I do another one of these cosmetic bags.) NOTE: See how the ends of the zipper hang over the fabric.
with a picture next time I do another one of these cosmetic bags.) NOTE: See how the ends of the zipper hang over the fabric.


Now you sew the raw edges together, zipper in the “center” of the bag. Starting with the bottom first. What I do after I do a straight stitch I do a zig-zag next to the straight stitch, if you have a serger, you can use that as well. Being that I don’t serger the seam I cut close to the zig-zag. Now you are ready to do the top. When you do the top, make sure you open the zipper. You don’t want to sew the top of the zipper where the pull is because the pull has to be INSIDE the bag. Also you need a pull on the outside, I use a ribbon and place it in the center of the zipper (see picture #3). The ribbon is 3 1/2 and folded in half.


Now that you have completed the top of the cosmetic bag, again zig-zag or serger the top. You are now ready to do the box corners. You will be doing all 4 corners. Fold the corners and match the seam with the fold in the fabric. Take your ruler and measure 1 1/2 from the tip. Mark with a marker tool, then sew. Again you can serger that seam, but I just used a pinking shear to cut off the extra.


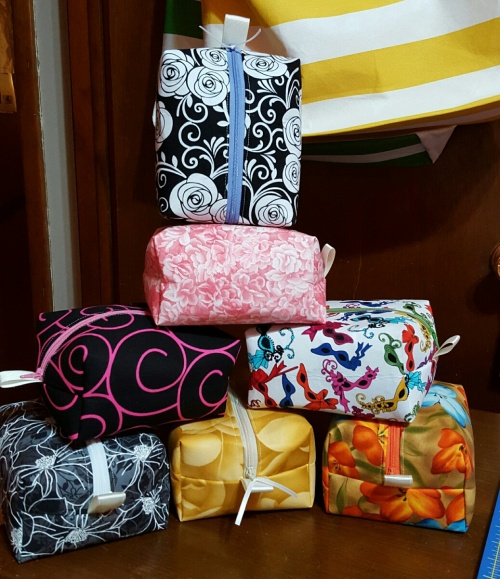
Now you are ready to turn your cosmetic bag right side out. Looks great doesn’t it. And my friend had her bags in not time! In the photo below you can see the size of the clutch bag compared to the cosmetic bag which is 10 x 16 but finished size is 6 x 5 x 3.