Category Archives: Crafting

Are we talking aprons????

While we are on the subject of aprons…. Here is another pattern I picked up, but not at Hobby Lobby. I stumbled on it while at Uhm, cough, Wal-Mart. 

Yeah, yeah yeah, what can I say. Sure I can sit at JoAnns and sit through looking through books of patterns but I’m on limited time. This one just popped out at me on one of their racks. I do have other patterns I purchased but dang, this one is sooooo easy. Maybe that’s why Simplicity came up with “Its So Easy”. The other thing when Hobby Lobby has their patterns on sale the it’s so easy is NOT 99 cents, they stay at the 6 dollar price. Remember I used to work there. Oh yeah I quit my day job to pursue my dream. 

Anyways this pattern at Walmart was under two bucks. You can’t go wrong can you. Pattern number A8120. Comes in 3 sizes and a little girls pattern too! 

The thing I like about this pattern is that it has a big pocket for the front and then the back that creates that big pocket. Then the waist band. Did I tell you I really don’t look at the instructions? I just look and toss to the side. Maybe because I’m a seasoned sewer. 

Basically the biggest part is making the waistband. The fast and easy is attaching the bias tape to the pocket edges and the edges to the two main pattern pieces.

Most of the aprons I am making are 14-16, however I’m an 18 and these fit me. Only takes less than 7/8th of fabric, but if you know how to lay the pattern you can use less. Even when I am short on fabric for the waistband, I know how to improvise. I even make the straps longer. 

When I did the first set of aprons I asked my daughter, pattern says use contrasting fabric for waistband. I said don’t you think the same fabric as the pocket looks better?she said visual mom, visual, lol. Yes she is like me. Grabbed the fabric laid it and she said yup you got it. Don’t use the plain stuff. On the pink Eiffel Tower, ran out of fabric and bought it last year so I had to opt for plain. But heck it looks great!

Here are the first ones completed, 4 more to finish, but heck I’m not done making these. I have a lot of polka dot fabric to make a lot of these “retro style half aprons”! 

The gal at the new location saw photos of these and she said these are a must.

Am I having fun yet? I think so.

ENJOY and like and share!! 


Gallery

Women’s ApronsĀ 

Yay!!! Yes I have a mannequin for my adult women aprons. Uhhhh well she’ll be modeling the men’s sport aprons too. I told my daughter I gave her a name….  Manny Quinn. She actually came down from her bedroom and … Continue reading

Gallery

Children’s Aprons

Another item that I sell at my booth down at Nickorbobs in Divernon, Illinois are little girl aprons. I’ve sold embroidered ones with ballet slippers, cupcakes of ll sorts, however now I make my own fabric ones. They are fast … Continue reading

Fold n Stitch Wreaths

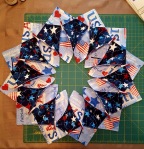
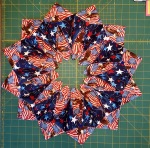
This year I have been busy making fold n stitch wreaths. Selling them as centerpiece for tables for the different holiday seasons. You can buy the pattern however I just looked at pictures and figured it out, so please do not ask who makes the pattern and directions. There are several YouTube on how to make. Just to let you know it is a long process however when completed they look great. You can make them for wall hangings as well, I need to look into this.

I continue to make these as a friend of mine is a manager at a fast food chain and she requested me to make them for each season for their display for their catering side.
Just finished making my first fall one. Yes a few more to make in different fabrics, then on to Christmas. Yes I have to be ahead of the seasons for a reason.

Hope you like and notice on the 4th of July one you can actually put on your patio table and put the wreath where the umbrella goes.

It’s been awhile since I posted and please “like or pin” on Pinterest!

Thanks for viewing, more posts coming….


Tutorial – Cosmetic Bags

A friend of mine contacted me Monday morning regarding my clutch purses. She was looking for a birthday gift that she needed by Saturday. She saw one of the clutches she liked, wanted to know price and if I still had fabric. Of course, silly question right ladies. So the only worry was getting it by Saturday.

After running around like a chicken with its tail feathers gone doing errands I finally get home to start the project. Here I will tell you how to make a cosmetic bag, complete with pictures. You will notice that I was so into getting this custom order done, I actually sewed up the things not realizing I didn’t take a snap shot.

Pick your fabrics. Usually these cosmetic bags are 10 x 10, but I go 10 x something. Iron the heavy weight fuse able interfacing to the main fabric. You will be using a zipper larger than 10 inches. Now to the machine.

Place the lining and fabric back to back, placing the zipper on top of the main fabric with the zipper pull down. Since you will be using a zipper larger than 10 inches, you do not center it, just let the extra hang on both the top. Eventually you will be cutting the extra off.Ā Then using your zipper foot, sew together. I used quilting clamps to hold the items in place to get a even straight stitch, not shown. After you have sewn the zipper on, then fold the fabric over to top stitch. I used YKK zipper and was able to use my regular presser foot to do the top stitch. There all done, now to do the other side.

Fold the other side with the lining on the outside, main fabric on the inside. Make sure all edges match up, even the raw edges to the best you can. You then change back to your zipper foot and sew. Oops guess what, I forgot a picture on how to top stitch the other side. You need to open the zipper all the way in order to fold the fabric and top stitch. Its a tight fit but can be done. Again I switched back to my presser foot and my top stitch was 3.5. Now you have your zipper done. (I will update with a picture next time I do another one of these cosmetic bags.) NOTE: See how the ends of the zipper hang over the fabric.


Now you sew the raw edges together, zipper in the “center” of the bag. Starting with the bottom first. What I do after I do a straight stitch I do a zig-zag next to the straight stitch, if you have a serger, you can use that as well. Being that I don’t serger the seam I cut close to the zig-zag. Now you are ready to do the top. When you do the top, make sure you open the zipper. You don’t want to sew the top of the zipper where the pull is because the pull has to be INSIDE the bag. Also you need a pull on the outside, I use a ribbon and place it in the center of the zipper (see picture #3). The ribbon is 3 1/2 and folded in half.

Now that you have completed the top of the cosmetic bag, again zig-zag or serger the top. You are now ready to do the box corners. You will be doing all 4 corners. Fold the corners and match the seam with the fold in the fabric. Take your ruler and measure 1 1/2 from the tip. Mark with a marker tool, then sew. Again you can serger that seam, but I just used a pinking shear to cut off the extra.

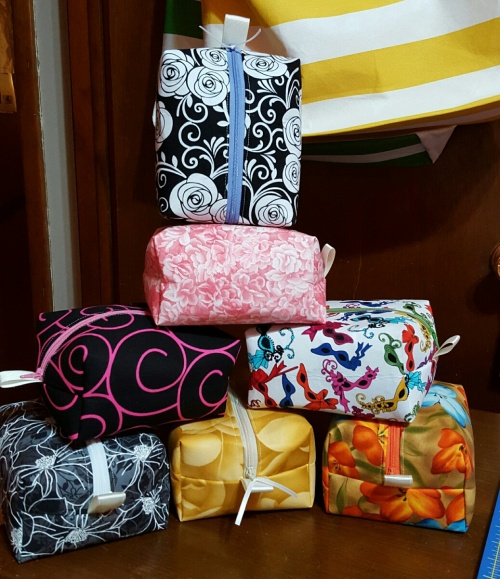
Now you are ready to turn your cosmetic bag right side out. Looks great doesn’t it. And my friend had her bags in not time! In the photo below you can see the size of the clutch bag compared to the cosmetic bag which is 10 x 16 but finished size is 6 x 5 x 3.

20160222_131806-1_resized

Cosmetic Bags

So thrilled to get those zippers I was off to the sewing room on Sunday to start making my cosmetic bags. Sure I did 4 a couple weeks ago but I had cut up fabric to make over a dozen, but I depleted my zipper stash. OMG now instead of just having a fabric stash, I have ZIPPERS!

As soon as chores and errands are done, up in the room. I just started working on them as fast as I could. Getting tired I finally put the machine to rest at 7 pm. Again these are fast, easy and great looking bags. I still have a lot of these to do, but I am looking forward to getting back in there and completing at least 12.

I have created a hand written tutorial on how to make these even though I did find them on youTube. I noticed that again these items are being sold over priced. Me I am charging a more reasonable price.

Check em out. Its getting late again and my lids are closing.

20160221_191734-1_resized


Purse Clutch

After making all those triangle pouches I ran out of zippers. I have 2 days off of work what am I going to do now!

I ran into this easy and quick purse clutch several years ago. I’ve kept the pattern and have it on a brown paper bag. I’ve even made it a tad larger to make the clutch a nicer size. I have made the smaller version and might go back to making more of them. They were the perfect size to put a check book, pens and other important papers in my purse. I even used it for throwing make up and other essentials in it so I wasn’t searching at the bottom of my purse.

When I have googled youTube items and it says make this or that in 30 minutes, I sit there and say yeah right. But yes you can figure 30 minutes for these, but again, that is just sewing time. All you need is lining, main fabric, heavy weight fusible interfacing and this go round I used velcro.

I find myself googling and checking ETSY to see if certain items are being made to see their end products as well as prices they are charging. This particular clutch, no where in site. Lucky me! So when I get down time, I’ll be getting my ETSY site back on board. I’m pricing these at $ 9.00 and smaller ones probably around $ 7.00.

Last night I finally posted these on my Facebook. I like to let my friends see what I am doing because they are my inspiration and backbone. They love the items I am making and well I get comments like; you’ll have no problem selling them, being an inspiration, loving my fabric choices as well as where did I get the pattern.Ā I probably posted the original a long time ago.

So check these out and eventually I will be doing more. Another project using remnants! I’ve got about 9 more of these to do. I cut doubles this time around!


More Triangle Pouches

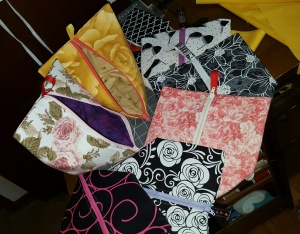
Since I didn’t use up all my zippers I continued last Wednesday in making more triangle pouches. Even though I like these a lot, I figured I would finish up what I had cut and wait to see what customers prefer the most over the pouches I have been making. I have been receiving feedback from personal friends and well Facebook people.

I noticed as I scouted around ETSY that this is a popular item, however again its the preference of the person.

Here are my remaining triangle pouches and I’ll see shortly if I should continue them. I did run across another form of pouch, however I have to study it to see how it is constructed.

These triangle pouches run around $ 8.50 a piece and I’ve seen people charging much more. From my stand point if you pay more than nine bucks, you’ve paid too much. Also when you look at pictures of handmade sewn items, you know you can zoom in to see the construction really close.

One nice feature of the triangle pouchesā€¦ they fold up nicely. Heck I just keep my filled with my overnight items.

Finishing Old Projects – Lining Beach Totes

Isn’t it always true that we have a project laying around that needs to be finished. Oh I have lots of them. I get started on one thing and the next thing you know, I am pushing it aside and moving to something new. Well heck look at my blog, I’ve been posting a bunch of stuff lately.

Being bored and not wanting to watch tv with my spouse, I finally got up off the couch and wondered what to do. I couldn’t make any more of those pouches/bags from the other days because I need more batting and interfacing. Tomorrow a trip to JoAnn’s, they have interfacing on sale, plus a few other items.

I was going through my treasures last week and remembered the beach totes. I am planning on setting them up for sale and I better get them done. They only need to have the lining and handles put on. Shouldn’t take long. Remember – “shouldn’t”!

I look for that dang plastic container I put them in and almost ditched the idea, but I stuck to my guns. 3 containers later, found! I had started these totes a bit ago and they will definitely make great beach totes or even weekend traveler totes. These are comparatively small, in my eyes, as I’ve made even bigger ones.

So lets get to the lining. No matter what type of fabric purse or tote I make, I like to have pockets in them. Planning on just putting two on either side of the tote. These pockets are generic and easy. I don’t know if I have posted construction of pockets in the past, but I am going to anyways do it again. I will be posting another one in the near future as I have one more lining to complete and I want to cover how I do pockets in that one.

I cut my fabric for the lining 21 x 34. I don’t plan to have a seam at the bottom, just a box end. I cut a piece of fabric that was 9 inches in length, 44 width. I then cut the fabric in two. I folded them in half. Before doing anything else, I ironed and used some craft interfacing on one side of the pockets. To the sewing machine. I sewed the side and top of the pocket. Cutting the corners carefully, turning right side out, pinning, then ironing. The reason I pinned after the sewing, I want to make sure my seams are clean. I then quickly sew two lines of top stitch. Now ready to place on the lining.

20160214_123826_resized

I find my middle on the lining fabric. Ā I then have to figure where the placement of the pocket will be. When I do my bags/totes I take and fold over the main fabric into the inside to give it a more clean finish. There is about 3 inches. I don’t want to go down too far, but then again, I don’t want it to be too high. I figured I will go 4 inches down from the raw edge of the top of the lining.I am figuring I have 6-7 inches from the top of the pocket and the height of the bag is around 17, the height of the pocket is 8, figuring the top seam and the bottom, so thats perfect. Hope I haven’t lost you yet, but if your a sewer you can visual.

Laying my ruler on the raw edge of the fabric, in the middle, I then place the pocket in line with the ruler. I still have that raw edge on the bottom of the pocket that I didn’t stitch up because I always like to take 1/2 inch and fold it up. What I do is I take that “1/2 tail” and sew it on the lining to form the bottom of the pocket, I previously ironed that edge. That closes up the pocket and keeps it straight. First I did a straight stitch, following behind that I then stitched a stitched zig-zag stitch. Now the pocket is secureĀ to the lining.

20160214_124416_resized

Now you fold the bottom of the pocket up pin on the top and bottom of each side of the pocket. When ready to sew, sew from the bottom to the top to ensure that it lays flat and there is no little gathering from extra fabric sewing from the top to the bottom. I used a two top stitches on both sides of the pocket. Eyeball the distance from the sides of the pockets. I can’t give you my dimensions because all machines are different.
20160214_132046_resized

Here you see the top of the pocket with two lines of top stitching, the folded bottom and then the top stitching on the left side. Usually when I make pockets,Ā I like to have the top of the pocket seamless and the bottom of the pocket <raw edge> turned over. The only noticeable seams would be on each side. I was not thinking when I cut the fabric. I like my purses to have clean edges. It looks more professional. Oh well I’m not perfect.

Now when I cut my lining I cut it to the width of the bag. the height was the whole length of the fabric, so I cut off some of the top because I was not planning on making a bottom seam in the lining. Does that create a problem when sewing the lining to the bag? No. But now I am ready to stitch both side seams and create my box side. Since the bags or totes have been sitting, I wasn’t sure what size the box corner was, so I merely measured the tote. It was 5 inches for depth. I ironed my lining to make sure I had a line to line up my side seam to the bottom crease (fake seam). Taking a ruler, I measured 5 inches from side to side and then marked with a marker that eventually disappears. Then I stitched down the line using a stretch stitch because it stitches the seam with 3 threads. This will hold the seam well. I then also did a stitched zig-zag next to the seam. I just have a thing about making sure particular seams are sewn securely.

Yes, I could have folded the seam in the middle however I didn’t. I have no reason to give. I then cut the extra fabric from the corner. Then I placed both pieces together. The outside of the tote to the inside of the lining (pockets to the main fabric). Stitched the top, leaving enough room to turn. The open area of the lining to main fabric, I stitched closely together and did not hand stitch closed, my preference as long as I do it closely and its not noticeable. I then measured the main fabric around the top, giving the dimension I want for the main fabric to be inside the tote. Ironed the top to from a crease, then did two top stitches. Ready to put the straps on. I didn’t measure how long the straps were. I had them pre-cut when I first started these 3 tote bags.

NOTE: Did you know when using binding trim for handles on tote bags, you use a lighter to melt the fibers together so they don’t fray. This is for the strapping trim that is not cotton! Ā And if you are ironing out creases make sure you use the lowest setting on your iron. Dang stuff melts to your iron, yeah I did it.

When I put the straps on I measured 4 inches from the side seams. I eyeballed how far I wanted them to be from the top of the tote. I had 3 tote bags to do. As I grabbed the green striped one, to check where I had calculated placement of the straps, I looked and again – – SURPRISE – it was already lined. Now why couldn’t the blue and white striped one have been done too. I would have had only the white and yellow stripe to do. Always something. So here are the two finished beach tote bags (the green one just needed straps, go figure). And these totes were ironed nicely, prior to putting on the straps, who’d of thunk they would get all wrinkled after I put them on. I was tired and just wanted to get snaps of them both. You will see the yellow one is a longer tote, so more room to stuff more stuff! I like both of them. When I do the blue one.. I’ll do the lining similar to the green one and post it. The green one actually has a zipper pocket, omg how did I do that – I HATE ZIPPERS!

Triangle Pouches

Saturday’s project was to make a different type of bag for traveling, overnight or even make-up. This particular bag is related to the previous post Sewing Day – Make up pouches. One of the differences is you don’t sew a box style bottom and you only sew the ends across, but opposite from the other.

20160214_124634-1_resized

I actually received one of these from a older lady years ago when I was a moderator of a yahoo group. Do they have those anymore, laughing. I would do different type of swaps with women throughout the United States. She got involved with all my swaps and she thought she would send me something special. I still use it today. I LOVE IT! And I wanted to copy it not knowing it had a name as well as the easy process – triangle pouch.

This is an excellent item to make with all those remnants you have laying around the house. Even if you don’t have any remnants at home, you can always check the fabric stores to see what they have in order to make them. All you need is 10 inches, even 16 inches and you can make 4 of them. This could be a good project for a young girl to learn how to make. I was uneasy about zippers, but not anymore. A good way for a younger child to learn. When I have customers coming in for daughters and granddaughters learning to sew, this will definitely be on my list of items to learn. I can just see these 9-13 year olds making these for all their friends.

The other neat thing about these, their great for presents. You could whip up a bunch of them and use them for Christmas, sorry I’m late. Presents for teachers, church members, relatives, friends, the list goes on. Another thing, it doesn’t have to be for the teen or adult woman, it could be great for younger girls to put hair productsĀ or even their own private nail polish and other items.Ā Another thing, why is this geared only for the females, this could be a cute item for smaller boys. Using a boys fabric, they could put their small cars in it and zip it up and be on the way to their friends, grand parents or even to carry with them when being in the car for a lengthly drive. Its very compact.Very versatile.

How did I stumbled on this bag or pouch? When I was googling youtube for pouches with zippers. The video I was watching was very informational. The thing is, the video I was viewing was for smaller pouches, for things you use in your craft room for example. You used a piece of fabric that was 5 x 10 whereas mine were 16 x 10. So no matter what size you make all you need is fabric, batting or interfacing and you need a zipper that is 10 inches or longer. You can view the video here Ā https://www.youtube.com/watch?v=cXZ6BTEnPE4Ā Vanessa great job in explaining how to create this fun and easy item. I plan on looking at more of your videos!

After dinner I had 7 bags to make and I figured I would time how long it would take to complete them. Even though there were breaks or interruptions, I was able to get them all completed within 3 hours. Not bad at all, however, I did cut all the fabric and batting early in the morning so a step avoided. Heck you could take a bunch of fabric and just cut it up and store in a zip lock bag for the future, you know that unexpected gift!

I had a lot of fun making these up and I am planning on selling them. And I feel the price will be just right. I am also going to be using them for different grab bags that I will have throughout the year down at my booth. If your interested in purchasing one of them, asĀ you are not a sewer and you could use a few pouches/bags, just give me a jingle!

Thank you for viewing my post – Triangle pouches. Please come back for more ideas. Check out a closer look of the ones I did. They fold up really nice too when not in use!

This slideshow requires JavaScript.